Printed circuit boards (PCBs) underpin virtually every modern electronic device—from home appliances and automotive electronics to computers and industrial equipment.
Over time, PCBs accumulate dust, flux residue, oils, and, worst of all, rust or corrosion when exposed to moisture or chemicals. Left unaddressed, these contaminants lead to poor conductivity, intermittent failures, and even total board failure.
In this in-depth guide, we’ll share expert-tested techniques for how to clean a PCB, covering cleaning of PCBs, rust removal, and safe ways to restore printed circuit boards to full functionality.
Whether you’re a hobbyist repairing a vintage radio or a technician maintaining production line equipment, our step-by-step process will save you time, money, and headaches.

Tools and Materials for Cleaning a PCB
To clean a PCB, you need the right tools. Using proper items makes cleaning easier and protects the board. Below are the main tools you will need.
Isopropyl alcohol (99% is best for cleaning)
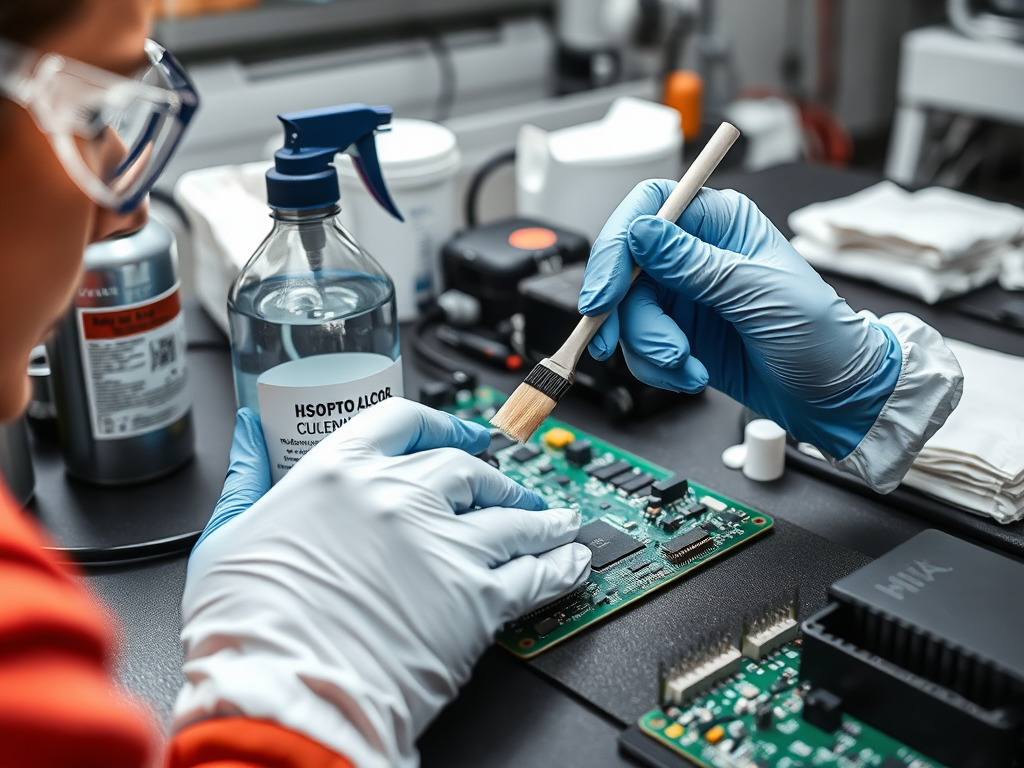
Isopropyl alcohol works great for cleaning PCBs. Use 99% alcohol because it dries fast and leaves no marks. This keeps the board free from anything that might affect circuits. It is also used to clean things like cables and screens. Its quick-drying feature makes it safe and easy to use.
Tip: Use isopropyl alcohol in a place with fresh air. Wear gloves to keep your skin safe.
Soft brushes (like a toothbrush or anti-static brush)

Soft brushes help remove dirt, rust, or grime from the PCB. A toothbrush or anti-static brush works well for this. These brushes clean without harming the board’s small parts. Do not use hard brushes, as they can scratch or break parts.
Compressed air or blower to clear dust
Compressed air is great for blowing away dust and dirt. It cleans tight spaces without touching the board. Use short air bursts to avoid damaging small parts. If you don’t have compressed air, an air blower works too.
Note: Keep the air can upright to stop liquid spray on the board.
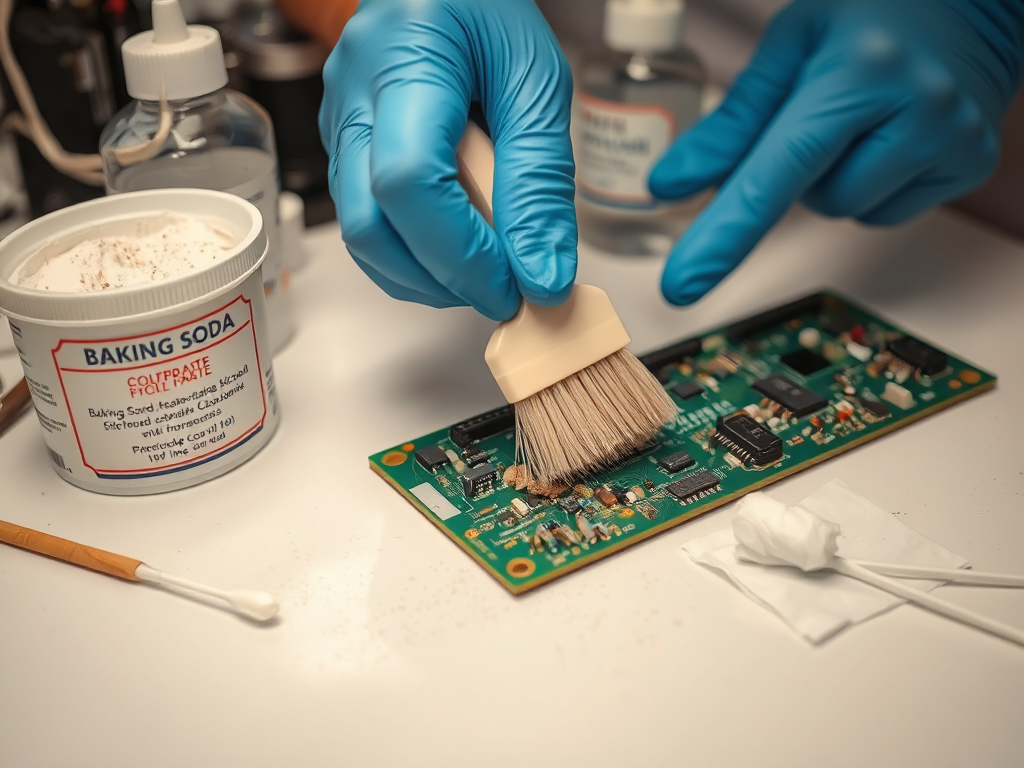
Corrosion removal solutions (e.g., baking soda paste or vinegar)
If a PCB has rust or corrosion, simple items like baking soda or vinegar can help fix it. These are great because they break down rust, making it easy to clean.
- Baking soda paste: Mix baking soda with water to make a paste. Spread the paste on rusty spots of the PCB. Use a soft brush to gently scrub the area. Baking soda’s gentle texture removes rust without harming small parts. After scrubbing, rinse the board with distilled water and dry it well.
- Vinegar: Vinegar is an acid that helps loosen rust. Dip a cotton swab in white vinegar and apply it to rusty areas. Let it sit for a few minutes to soften the rust. Then, clean the spot with a brush. Wipe off any leftover vinegar with a lint-free cloth.
Tip: Test these methods on a small part of the PCB first to ensure they don’t cause harm.
Both baking soda and vinegar are safe and easy to use. They are great for cleaning at home. But don’t leave them on the board too long, as they might hurt delicate parts.
Microfiber cloths or lint-free wipes for drying
Drying the PCB after cleaning is very important. It stops water from causing damage. Microfiber cloths or lint-free wipes work best for this. They soak up water well and don’t leave fibers behind.
To dry the board, gently press it with a microfiber cloth. Don’t rub it, as this might move small parts. For tight spaces, use compressed air to blow out water. Make sure the board is completely dry before using it again.
Note: Avoid paper towels or regular cloths. They can leave lint or scratch the board.
Using the right tools for drying keeps your PCB clean and ready to use.
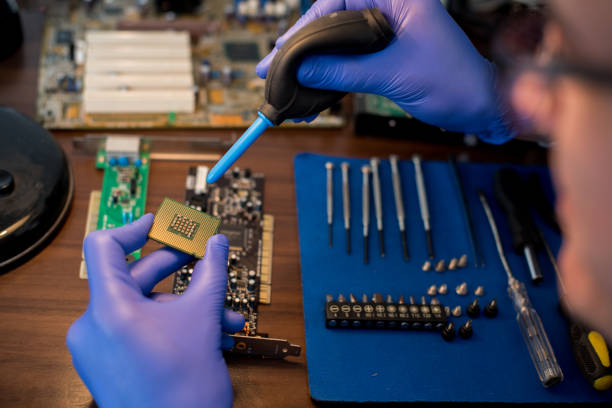
Protective gloves and safety goggles for safe handling
Always stay safe when cleaning a PCB. Wear gloves and goggles to protect yourself from harmful chemicals and accidents.
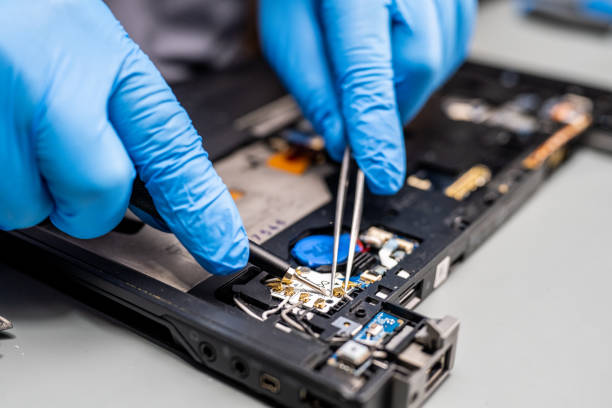
- Gloves: Use gloves made from strong materials like nitrile rubber. These gloves keep your hands safe from alcohol, vinegar, and other cleaners. They also stop oils from your hands from getting on the board.
- Goggles: Safety goggles protect your eyes from splashes or flying dirt. This is especially helpful when using compressed air or scrubbing the board.
Reminder: Work in a space with fresh air to avoid breathing in fumes. Wearing the right safety gear helps you clean your PCB safely and reduces risks. Here is the list for your preparation.
| Tool / Material | Purpose |
|---|---|
| Isopropyl Alcohol (IPA, ≥90%) | Dissolves flux, oils, and light corrosion; evaporates cleanly |
| Distilled Water | Rinsing after cleaning to avoid mineral deposits |
| Soft-Bristle Brush | Gentle scrubbing of board surfaces and between components |
| Toothpicks / Plastic Picks | Accessing tight spots and lifting stubborn debris |
| Compressed Air / Air Blower | Blowing away loose dust and moisture after rinsing |
| PCB-Safe Cleaning Solution | Specialized flux removers or degreasers for heavy residues |
| Rust Remover / Corrosion Inhibitor | Chemical removal of oxidation and protective treatment afterward |
| Lint-Free Cloths / Swabs | Wiping off cleaner and drying surfaces without leaving fibers |
| ESD Wrist Strap & Mat | Preventing electrostatic discharge during handling |
| Fine-Tip Tweezers | Removing small particles and positioning components |
| Protective Gloves & Safety Glasses | Personal protection when working with solvents or acids |
Step-by-Step Guide of Cleaning PCB
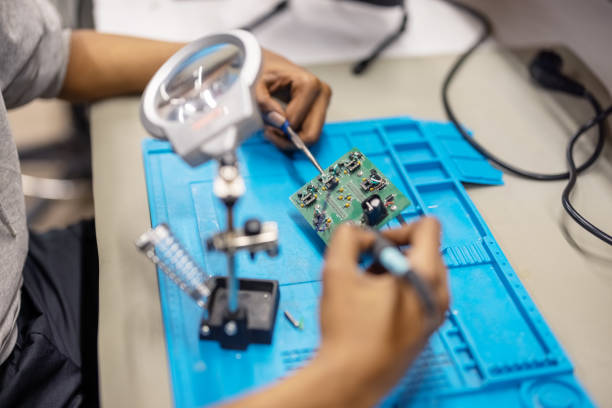
Cleaning a printed circuit board (PCB) needs care and the right steps. Follow this guide to clean your PCB safely and effectively.
Preparation: Turn off power and remove parts
First, turn off the power to avoid electrical shocks. Disconnect the PCB from its power source. Take off removable parts like batteries, cables, or modules. This keeps cleaning liquids from harming sensitive areas or causing short circuits.
Look for dirt, rust, or debris on the board. Mark spots with heavy rust for extra cleaning later. Preparing well helps make the cleaning process successful.
Tip: Be gentle when handling the PCB to protect fragile parts.
Cleaning with isopropyl alcohol: Steps to scrub safely
Isopropyl alcohol is great for cleaning PCBs. Gather what you need: 99% alcohol, a soft toothbrush, lint-free wipes, and gloves. Work in a place with fresh air to avoid breathing fumes.
- Apply alcohol: Wet the toothbrush with alcohol, but don’t soak it. Too much liquid can harm the board.
- Scrub softly: Use the brush to clean dirt, solder spots, or grime. Focus on rusty areas and press lightly to avoid damage.
- Wipe debris: Use lint-free wipes or cotton swabs with alcohol to clean loosened dirt. This removes leftover grime.
- Repeat if needed: For tough dirt or rust, repeat the steps until clean.
Experts say isopropyl alcohol cleans PCBs well without leaving marks. It keeps the board working properly.
Note: Don’t use water-based cleaners. They can cause rust and moisture problems.
Using compressed air: Remove dust and dry the board
Compressed air helps clear dust and water from PCBs. Spray short bursts of air to clean tight spaces. Tilt the board so dust falls away.
Dust left on PCBs can attract water and cause rust later. Compressed air stops this by drying and cleaning the board. Keep the air can upright to avoid spraying liquid onto the board.
Tip: After cleaning, use compressed air to dry the PCB completely before putting it back together.
Using compressed air keeps your PCB safe from water damage. This step helps your device last longer and work better.
Drying the PCB: Ways to Remove All Moisture
Drying a circuit board after cleaning is very important. Leftover water can cause rust, short circuits, or damage over time. To make sure your PCB is fully dry, try these simple methods. Each has its own benefits, so pick what works best for you.
1. Baking at High Heat
Using an oven is a reliable way to dry a PCB. Set the oven to 120 °C and bake the board for 4 to 8 hours. This method dries the board well but don’t use it too often. High heat can slowly harm the board. After baking, store the PCB in a cool, dry place to keep it safe.
2. Vacuum Drying
Vacuum drying removes water without using heat. It uses a vacuum chamber to pull out moisture. This method is cheaper than other advanced options. While not common at home, it’s popular in industries because it works well.
3. Nitrogen Chamber
For delicate PCBs, a nitrogen-filled chamber is a good choice. This method lowers moisture to very tiny amounts, below 0.5 ppm. It’s great for sensitive boards but is more specialized. It prevents rust and keeps the board working longer.
4. Climate-Controlled Chamber
A climate chamber controls temperature and humidity perfectly. It’s a top choice for drying PCBs but costs a lot. This method is mostly used in professional labs where accuracy matters most.
5. Basic Baking Tips
If you don’t have special tools, baking at low humidity works too. This is helpful before soldering to stop rust and ensure good connections. Watch the PCB while baking to avoid overheating.
Here’s a quick comparison of these methods:
| Drying Method | Time Needed | Temperature | Notes |
|---|---|---|---|
| Baking at high heat | 4-8 hours | 120 °C | Works well but may harm the board if done often. Store at 20-25 °C, <5% RH. |
| Vacuum drying | 2-6 hours | 40-60 °C | Cheaper than other advanced methods. |
| Nitrogen chamber | 1-3 hours | Room temperature | Reduces moisture below 0.5 ppm for sensitive boards. |
| Climate-controlled chamber | 3-12 hours | Room temperature | Very expensive, used for precise drying in labs. |
| Basic baking tips | 1-2 hours | Low humidity | Useful before soldering to stop rust and improve connections. |
Tips:
- Check the PCB after drying to ensure no water is left in small spaces.
- Use compressed air to remove trapped moisture if needed.
By using these methods, you can dry PCBs properly and fully. Good drying helps your board last longer and work better.
Best Way to Clean PCB Rust and Corrosion
Rust and corrosion on printed circuit boards (PCBs) can significantly impair their functionality and longevity. Next, we’ll explore step-by-step methods for cleaning rust and corrosion from circuit boards, ensuring they remain in good condition and function effectively.
Whether you’re dealing with minor rust spots or more severe corrosion, following these procedures can help restore your PCBs and extend their lifespan.
How to clean rust off circuits?
Rust on a circuit board can harm its performance. If left untreated, it may cause permanent damage. Follow these steps to clean rust:

Rust on a circuit board can seriously affect its performance and may lead to permanent damage if not addressed. Follow these clear and actionable steps to effectively clean rust from your circuit board:
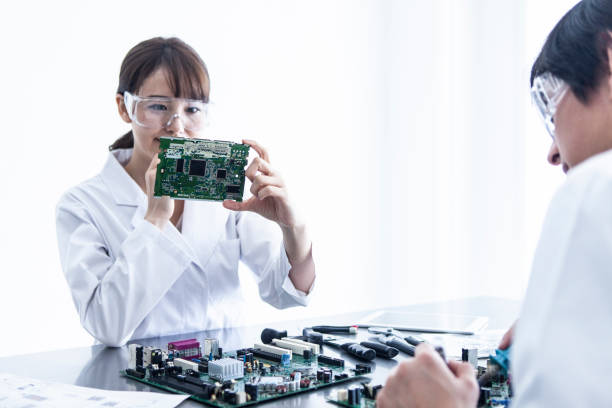
Step 1. Inspect the Board:
Carefully examine the circuit board for rusty spots or damaged metal areas. Identifying these areas will help you know where to focus your cleaning efforts.
Step 2. Gather Your Tools
- Safety Gear: Wear gloves and goggles to protect yourself.
- Tools Needed: Have baking soda, water, a soft brush, 99% isopropyl alcohol, a cotton swab, a microfiber cloth, and compressed air ready.
- Preparation: Turn off the power and unplug the board. Work in a well-ventilated area to avoid inhaling fumes.
Step 3. Create a Rust Remover Paste
Mix baking soda with a small amount of water to form a thick paste. Apply this paste to the rusty spots and let it dry for about 24 hours.
Step 4. Gently Scrub the Rust
Once the paste has dried, use a soft brush to gently scrub the rusted areas. Be cautious not to apply too much pressure to avoid damaging the circuit board components.
Step 5. Clean Residue with Alcohol
Dip a cotton swab in 99% isopropyl alcohol and wipe away any remaining paste or dirt. The alcohol will evaporate quickly, leaving no moisture behind.
Step 6.Thoroughly Dry the Board
Use a microfiber cloth or compressed air to ensure all moisture is removed from the board. This step is crucial, as leftover water can lead to further rusting.
By following these steps, you can effectively clean rust from your circuit board, enhancing its performance and longevity.
Tip: After cleaning, add a protective coating to stop future rust.
How to clean a circuit board of corrosion?
Corrosion looks like green or white residue on a board. It happens when the board is exposed to water or chemicals. Clean it carefully to avoid damaging small parts. Here’s how:
- Step 1: Inspect the board. Look for corroded spots, often near solder joints or metal parts.
- Step 2: Apply baking soda paste. Mix baking soda with water to make a paste. Spread it on the corroded areas and leave it for a day. Baking soda helps loosen the corrosion gently.
- Step 3: Scrub softly. Use a soft brush to clean the corroded spots. This removes the loosened residue without harming the board.
- Step 4: Rinse with distilled water. Distilled water is safe because it doesn’t conduct electricity. Use it to wash off the baking soda.
- Step 5: Wipe with alcohol. Use a cotton swab dipped in isopropyl alcohol to clean the rinsed areas. Alcohol removes any leftover dirt and dries quickly.
- Step 6: Dry completely. Use compressed air or a lint-free cloth to ensure no water remains before reassembling the board.
Note: For severe corrosion, try an ultrasonic cleaner. It uses sound waves to clean hard-to-reach spots.
How to clean electronic circuit boards
Keeping circuit boards clean helps them work better and last longer. Whether dealing with dust or corrosion, follow these steps:
- Step 1: Gather cleaning tools. You’ll need isopropyl alcohol, soft brushes, compressed air, and lint-free wipes. These tools make cleaning safe and effective.
- Step 2: Turn off power and prepare. Unplug the board and remove parts like batteries or cables. This avoids electrical risks and makes cleaning easier.
- Step 3: Blow away loose dirt. Use compressed air to remove dust. Spray in short bursts and keep the air can upright to avoid spraying liquid.
- Step 4: Clean with alcohol. Wet a soft brush with isopropyl alcohol and scrub gently. Focus on dirty areas. Alcohol dissolves grime and dries fast.
- Step 5: Dry the board. Use a microfiber cloth or compressed air to remove moisture. Make sure the board is fully dry before putting it back together.
- Step 6: Add a protective layer. After cleaning, apply a conformal coating to protect the board from dirt and corrosion.
Reminder: Regular cleaning keeps your circuit boards working well and lasting longer.
By using these steps, you can keep your circuit boards clean and in good shape. Cleaning rust and corrosion the right way helps protect the board and maintain its performance.
Precautions for Safe PCB Cleaning Process
Cleaning a PCB needs careful steps to stay safe. These tips will help protect both you and the board.
Avoiding too much moisture or liquid
Too much moisture can harm your PCB. Water stuck inside can cause short circuits. It may also speed up corrosion, which can ruin the board. Another problem is electrochemical migration (ECM). This happens when moisture helps tiny metal paths grow, causing unwanted currents.
To avoid these problems:
- Use only a little liquid. Apply isopropyl alcohol lightly to clean.
- Dry the board completely after cleaning. Use compressed air or lint-free wipes to remove water from small spaces.
- Don’t use water-based cleaners. They can leave residues that attract moisture.
Tip: Check the board for leftover water before putting it back together.
Being gentle with fragile parts
Circuit boards have small, delicate parts. Rough handling or wrong tools can break them. For example, when removing sticky materials or tough dirt, use methods that are gentle on the board.
Here’s how to handle it safely:
- Use a heat gun or hot air station to soften materials without overheating.
- Try ultrasonic cleaning to shake off dirt with sound waves.
- Use precise tools for scraping or cutting, but be careful not to damage nearby parts.
- Stay away from strong chemicals that might harm sensitive parts.
Reminder: Hold the board by its edges to keep oils from your hands off it.
Working in a well-ventilated area
Good airflow is important when using cleaners like isopropyl alcohol. Breathing in too many fumes can be harmful. A space with fresh air keeps you safe and makes cleaning easier.
| Key Tips | Details |
| Displacement Ventilation (DV) | Brings clean air in low and pushes dirty air out high. |
| Thermal Plumes | Pulls fresh air upward, keeping the air you breathe cleaner. |
| Energy Efficiency | DV systems save energy while improving air and removing harmful fumes. |
To improve airflow:
- Open windows or use a fan to move air around.
- Think about using a displacement ventilation system for cleaner air.
- Don’t clean in closed spaces to avoid breathing in fumes.
Note: Wearing a mask adds extra safety when using strong cleaners.
By following these steps, you can clean your PCB safely. This helps it last longer and work better.
Wearing protective gear to avoid skin problems
When cleaning a PCB, wearing safety gear is very important. It protects your skin from irritation or harm caused by cleaning chemicals. Substances like isopropyl alcohol or rust removers can dry out or burn your skin. Using the right gear helps you stay safe while cleaning.
Why Gloves Matter
Gloves keep harmful chemicals away from your hands. They also protect against cuts or scrapes from sharp parts. Choose strong gloves made of nitrile rubber. These are better than latex because they resist chemicals and don’t tear easily.
Tip: Always use new disposable gloves. Old ones may not protect well.
Why Safety Goggles Are Needed
Goggles protect your eyes from splashes, dust, and debris. Cleaning liquids like alcohol or vinegar can hurt your eyes if they splash. Snug-fitting goggles block particles and keep your eyes safe.
Other Safety Tips
- Wear long sleeves: This keeps chemicals off your arms.
- Use a face mask: It stops you from breathing in harmful fumes.
- Have a first-aid kit: Keep items like saline or burn cream nearby for emergencies.
Reminder: Check your gear for damage before starting. Torn gloves or loose goggles won’t protect you properly.
Wearing the right safety gear ensures you can clean your PCB safely. Always put safety first!
Cleaning your PCB often stops rust and corrosion, helping your device work well. Using tools like isopropyl alcohol, soft brushes, and compressed air makes cleaning easier and protects tiny parts. Follow simple steps—turn off power, clean with alcohol, and dry fully—to keep your board safe and working.
Easy-to-Follow Cleaning Tips
| Category | Details |
| Tools | Use small brushes for careful cleaning. Machines can help with big jobs but need caution. |
| Cleaning Supplies | HEPA vacuums, spray bottles, and lint-free wipes keep your area clean. |
| PCB Cleaning Process | Steps include taking apart the board, blowing off dust, using cleaner, and rinsing to avoid leftover dirt. |
- Attach HEPA vacuums to remove dust safely.
- Spray bottles and sanders lower dust during bigger cleaning jobs.
- Work in a separate area to keep others safe from mess.
Using these tips helps your PCB last longer and saves money on repairs. Regular care keeps your electronics dependable and running smoothly.
FAQ on PCB Cleaning
What is the safest way to clean a PCB at home?
Use 99% isopropyl alcohol and a soft brush. Gently scrub the board to remove dirt and grime. Avoid using water or harsh chemicals. Dry the board completely with compressed air or a lint-free cloth before reassembling.
Can I use vinegar to clean a corroded PCB?
Yes, vinegar works well for light corrosion. Apply it with a cotton swab to the affected areas. Let it sit for a few minutes, then scrub gently with a soft brush. Rinse with distilled water and dry thoroughly.
How often should I clean my circuit boards?
Clean your PCBs every 6-12 months, depending on the environment. Dusty or humid areas may require more frequent cleaning. Regular maintenance prevents rust, corrosion, and performance issues.
Is it safe to use a hairdryer to dry a PCB?
A hairdryer can work, but it’s not ideal. Use it on a low heat setting to avoid damaging components. Compressed air or an oven set to low heat (120 °C) is safer and more effective for drying.
What should I do if my PCB has severe corrosion?
For severe corrosion, consider using an ultrasonic cleaner. It removes dirt and corrosion from hard-to-reach areas without damaging components. If unavailable, consult a professional to avoid further damage.
Conclusion
In this article, we explored essential techniques for effectively cleaning printed circuit boards (PCBs) to ensure their longevity and optimal performance. By addressing issues like dust, corrosion, and residue, readers can prevent potential failures and maintain their devices more efficiently.
For those seeking professional assistance, GESPCB offers professional PCB manufacturing tailored to keep your PCBs in top condition. With a dedicated team ready to tackle any challenges, you can trust us to enhance the reliability and lifespan of your electronics.